1-144 GM Cannon Conversion Kit


| Released on: April 21, 2023 |
| Created by Scorn's Mecha Repository |
| Categories: |
| File | Size | Last Updated |
Last Downloaded |
|---|---|---|---|
| GM Cannon Backpack 1-144.stl | 5.0 MB | 21 Apr 2023 | |
| GM Cannon Cannon 1-144.stl | 21.0 MB | 21 Apr 2023 | |
| GM Cannon Cannon Large Muzzle 1-144.stl | 16.8 MB | 21 Apr 2023 | |
| GM Cannon Cannon Mount 1-144.stl | 588.2 KB | 21 Apr 2023 | |
| GM Cannon Cannon Tined Muzzle 1-144.stl | 33.4 MB | 21 Apr 2023 | |
| GM Cannon Chest Vent Port 1-144.stl | 2.2 KB | 21 Apr 2023 | |
| GM Cannon Front Skirt Center 1-144.stl | 26.9 KB | 21 Apr 2023 | |
| GM Cannon Cannon Straight Muzzle 1-144.stl | 31.4 MB | 21 Apr 2023 | |
| GM Cannon Front Skirt Left 1-144.stl | 3.0 MB | 21 Apr 2023 | |
| GM Cannon Front Skirt Right 1-144.stl | 3.0 MB | 21 Apr 2023 | |
| GM Cannon Head Antennae 1-144.stl | 1.3 MB | 21 Apr 2023 | |
| GM Cannon Leg Armor Inside 1-144.stl | 6.9 MB | 21 Apr 2023 | |
| GM Cannon Leg Armor Knee 1-144.stl | 2.9 MB | 21 Apr 2023 | |
| GM Cannon Leg Armor Outside 1-144.stl | 6.9 MB | 21 Apr 2023 | |
| GM Cannon Leg Back Hook 1-144.stl | 1.4 MB | 21 Apr 2023 | |
| GM Cannon lower torso template 1-144.stl | 2.8 MB | 21 Apr 2023 | |
| GM Cannon Magazine 1-144.stl | 15.9 MB | 21 Apr 2023 | |
| GM Cannon upper torso 1-144.stl | 17.3 MB | 21 Apr 2023 | |
| Presupports | 17 items | ||
| GM Cannon Assembly one pager.pdf | 564.6 KB | 21 Apr 2023 |
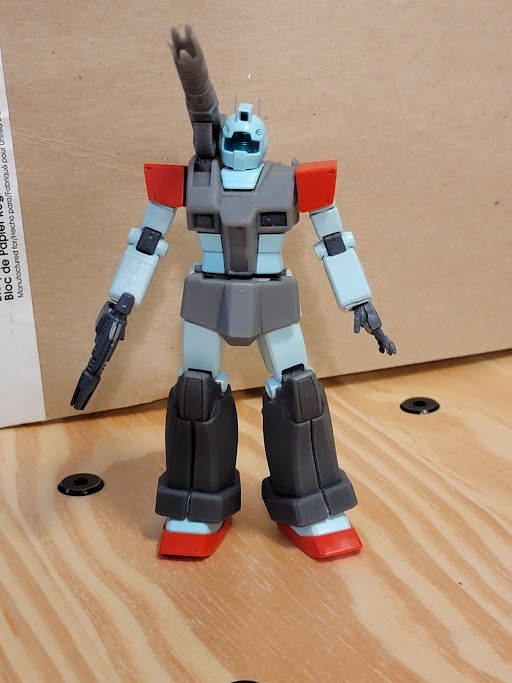
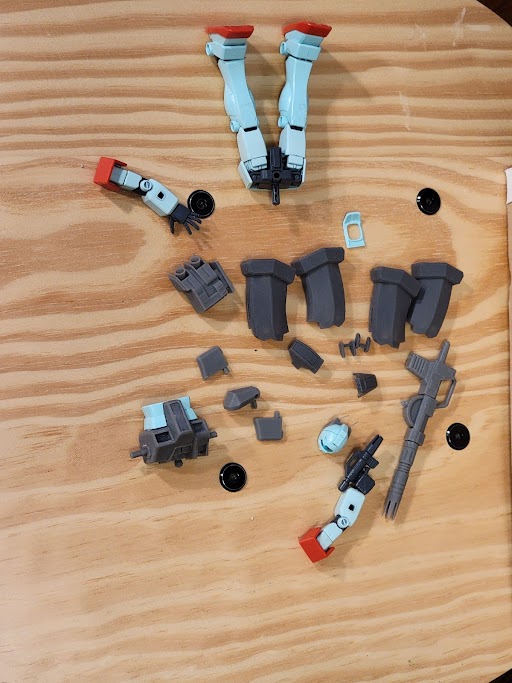
Ever get that feeling that your grunts could use a little heavy support? Now's your chance! The 1-144 GM Cannon conversion kit takes the1-144 HGUC GM kit (HGUC-20) and turns up the ordnance. Much like the description in MSV, these conversion parts either clamp on existing kit parts or replace them. The leg armor clamps on top of the kit leg and ankle armor, allowing for a good range of foot motion, but notably shifting the center of mass downwards for a more stable firing platform. The waist armor replaces the kit front armor, and has the option to be glued in place as per the original MSV, or given some articulation. The torso armor replaces the kit upper torso parts, with a minor modification of the lower torso parts (clipping the protruding pegs). As the GM Cannon has a variety of barrels in the different depictions, 3 different cannon barrels are available. The cannon itself has a range of motion of +25° / -15°, offering a lot of posing possibilities. The head antennae may be the trickiest to align, so be sure to use a slow acting glue. The left side chest vent has a part available, or you can use the kit part as you choose.
While these parts typically press fit and articulate where needed, gluing is always recommended for long term posing, as frequent repositioning starts wearing the resin down quite quickly. Additionally, depending on your printer tolerances, you may need to adjust a few parts by filing edges.